CLICK HERE FOR FREE BLOGGER TEMPLATES, LINK BUTTONS AND MORE! »

Monday, February 28, 2011

Piles & Piles of Art, OH MY


I am so excited that so many of you have started doing more crafts with your kids!  I love getting all the emails and comments about your projects.  Keep sending emails and pics. 

We are getting ready to move and I have realized I have hoarding tendancies. Before you start judging me and wondering if you recognize me from the A & E show it's not what you are thinking.  I'm not a hoarder in  the I have 45 expired yogurts in the fridge or bags of cat hair I can't part with kind of way.  I save things that have "sentimental value."  My college ID (do you think I can still get a student discount at the movies?), the last gift my mom gave me (a pair of socks still tied together with a blue ribbon), the boutineer my husband was wearing the night we fell in love (we were both standing up in a wedding)...and now that I have a kid it's piles and piles and piles of her artwork.  I just can't throw it away, so what the heck can I do with it?  Clearly, shoving all of them in her top dresser drawer won't work forever.

This is what I pulled out of the dresser drawer.


So here's what I'm doing!


Idea 1: Art Scrapbook

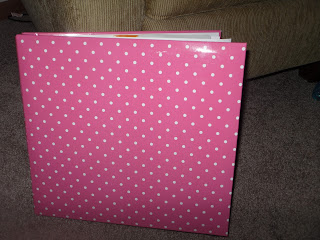
Why not make an art scrapbook?  I don't scrapbook (although I wish I did) so this is new for me.  I bought this scrapbook at Hobby Lobby for around $8.  It was 50% off and since I have never bought such a thing I have no idea if it was a "good deal" but I think it's super cute.  I am a sucker for anything with polkadots.


I am sure there is a super cute crafty way to arrange these but I just glued them to the pages.


Finished product!  Much neater!

Idea 2: Marble Magnets

I know you have seen these.  They sell them in cutesy stores, on Etsy, and at craft shows but they are SUPER easy to make.  I saw this idea on Not Martha (follow these directions they are really good). I first made these for a few friends as Valentine's Day this year using heart scrapbook paper.  Then I thought, why can't I use the kids' art instead of scrapbook paper? So, I tried it out and they turned out so cute.  These make great gifts for grandparent too! Who can't use more magnets? 

They don't photograph well...mostly because I suck at taking pictures


I bought this handy dandy  punch...made the process super quick and it was less than $5.


Idea 3: Use for scrap booking

Now, since I don't scrapbook I haven't tried it so it's technically just a theory.  But I am imagining using a painting or a colored piece of paper to cut out letters or mount pictures.  Saves $ and keeps memories...it's win-win.

Idea 4: Collage

Buy a collage frame.  Kohl's always has inexpensive collage frames on sale.  Trim pieces of art to fit in each section.  Then you are able to display 12 or so paintings neatly and in a small space. I plan to do this in the playroom in our new house.  And there's no law that says you can't encouage your kids to paint with colors that match your house!


Obviously Finley didn't paint those...it's just inspriation.

Happy Crafting (and organizing your crafts!),
Ames

*Just a note...the spell check would't work today so when you find typos...sorry.

Sunday, February 27, 2011

Bubble Wrap Fish

I don’t care how old you are or how mature you are…you know you LOVE bubble wrap.  There’s just something therapeutic about that rhythmic pop pop pop. It’s one of those simple pleasures in life. And if it excites me this much it must be very thrilling for my almost 15 month old (yikes, when did that happen) cutie pie.  It was!

The "eye" is a homemade magnet.


You will need:
Bubble wrap (small piece works fine)
Paint (I used yellow and red to make a goldfish)
Paper cut into a fish shape (thank you google images for the pattern)
Ziploc bag (optional)


Spread a thin layer of paint on the bubble wrap.  The less paint you use the more pronounced the circles from the bubble wrap AKA the scales will be.
I used too much paint


Place the fish on top.


Now, you can either have your kids paint the fish with the bubble wrap or you can put the whole project in a baggie.  I chose the baggie route so Finley could do this project in the living room.  I find that it's confusing to put toddlers in their normal eating place and then tell them not to eat the paint, etc.  Living room = less attempted art consumption.


Peel the bubble wrap off and let the fish dry.

It’s hard to see the “scales” in the picture but they are there!
 
The "eye" is a homemade magnet.


Happy Crafting,
Ames


Saturday, February 26, 2011

Check out the giveaway at Cloth Diaper Addiction

So...remember those awesome Melissa and Doug crayons I mentioned a while ago?  Well I am giving a set away over at Cloth Diaper Addiction.  They are having a huge 2,000-1,000 giveaway with tons of great stuff.  Head on over and enter!  (For the record I don't cloth diaper...maybe next time.  But those Cloth Diaper Addiction girls are great.) And remember when we reach 100 followers and 100 likes on Facebook we will be having our very own  giveaway.  So close!!!  Crafty post coming tomorrow. 


*I swear Melissa & Doug is not paying me in any way shape or form to tell you how much I love these crayons.

Wednesday, February 23, 2011

Rice Hedgehog

 How cute is this guy?  I had a pet hedgehog when I was in college.  His name was Leo and he was the sweetest little guy.  So, hedgehogs hold a special place in my heart.


You will need:

Brown paper cut into a hedgehog shape.  (I actually drew this one myself...that's how easy it is.  You can also google a pattern)

Glue

Rice (I used brown rice)

Optional: Box/bag to shake it in


Cut out a hedgehog and draw an eye.


Cover with glue.


For older kids have them sprinkle with the rice. Mine is 14 months so I put it in a box and had her shake it. She loved it because the rice makes lots of noise in the box. 

Let the hedgehog dry.  Then shake off the extra rice and hang it on the fridge.


Saturday, February 19, 2011

Things I Learned This Week

1. 20 inches of snow + 2 days of 45 degree temperatures = ankle deep puddles. I am not exaggerating. I have the ruined shoes to prove it.  If I wanted to exaggerate I would say knee deep. 

2. If it is going to rain for a mere 10 minutes a day, it's going to rain while you taking the kids for a walk.

3. People judge you when you walk into a liquor store at 10 a.m. with a double stroller.  They don't assume you will be walking out with iced tea. (Who am I kidding...I would totally judge someone doing the same thing.)

4. You don't need thumbs to lock yourself in the bathroom (the cat).  You just need to be desperate to escape the torture of "affectionate" toddlers.

5. I will do just about anything (ie. walk through puddles in the rain with 2 toddlers while being judged) for an iced tea.  It's like crack to me. 

Cheerio Starfish

This craft was fun for the kids (and doubled as a snack although that wasn't the plan).  Here's what we did...


You will need:
Cheerios
Paper Plate
Glue
Pencil or Pen
Scissors (for the adult)


First, draw a starfish on a paper plate.  I can't draw so I used google images and actually traced it off the computer screen (very carefully of course). Then, fill in the starfish shape with glue.  Note: I should have drawn the outline on the other side of the plate so the lines would not show when it was done...oh well.


Pour some Cheerios on the plate and let the kids shake it around and play with them. (Older kids could put the Cheerios on the plate on their own.)We counted the Cheerios and I encouraged the kids to put them on the glue.  I put down a blanket in the living room. Of course Cheerios went everywhere but I just shook the blanket outside when we were done.  In my opinion this is way easier than sweeping up a million Cheerios off the kitchen floor (I sweep that darn floor enough!).


Let the plate dry and then shake off the extra Cheerios.


Use adult scissors to cut out the starfish!


Happy Crafting!
Ames


Wednesday, February 16, 2011

The Very Hungry Caterpillar: Marble Painting

Who doesn’t LOVE The Very Hungry Caterpillar?  Eric Carle’s book is a classic and one of my (many) favorites.  Here is a fun and easy craft to make your very own very hungry caterpillar!

You will need…
Shoe box
Piece of tape (to keep the box closed)
Green paint
Marbles
Yellow paper cut into a caterpillar shape *
Red marker or crayon

*I can’t draw to save my life but I managed to draw and cut out a somewhat decent caterpillar.  I just drew a series of connected ovals and cut it out. 

Place the paper caterpillar (there are in the picture but you only need one for the project), a blob of green paint, and a few marbles in the box.  If you are worried about a potential mess use a piece of tape to keep the box closed.


Shake…shake…shake!

(Ignore the crazy hair and red eyes....we were recovering from a meltdown)


Take the caterpillars out and let them dry.


Add an eye and mouth.

Come on...how cute is that? 

Happy Crafting!
Ames

Tuesday, February 15, 2011

Have a great idea?

Do you have a great kiddie craft you would like to share on the blog?  Send me an email (include pics if you have them) with your ideas!  paintandprozac@gmail.com

Plastic Bag Painting!

This is my go to craft when I don't have the energy to come up with something better.  It's one of Finley's favorite activities.  I think she loves it because she actually gets to play with the forbidden plastic bag. We use a lot of Ziploc bags for projects.  I know, I know bad for the environment but it's good for this mama's sanity. I stock up when the Up & Up bags go on sale at Target or when the holiday Ziploc bags go on clearance (use with a coupon too for a great deal).


You will need:

Paint (any colors) 
Paper
Large Ziploc Bag.


Put the paper and paint in the bag and zip it up.


Smoosh and smash (technical art term) the baggie.


Take the paper out to dry and throw away the bag.  (You can rinse it out and use it for your next Ziploc project if you are feeling guilty about the landfills)


Voila!


Monday, February 14, 2011

Challenge Results

Random.org selected poster Emily Jo for the challenge.  Emily Jo suggested salt & pepper shakers and toilet paper. I have to admit my first reaction to TP was YIKES!!!  It took a but of thinking but this is what I came up with.  Emily, I hope you approve. 

We used:

bowl for mixing
toilet paper
glue
salt shaker (I cheated and didn't use a pepper shaker too)
sprinkles or glitter
fork for mixing
wax paper
cookie cutter (any shape)


Mix equal parts water and glue in a bowl. 


Rip up the toilet paper (great fine motor activity) and mix with the water/glue mixture.


Squeeze out the excess liquid.  Press into a cookie cutter (think xmas ornaments!). 


Fill the empty salt shaker with sprinkles or glitter and shake on the wet heart.


Let dry for 24 hours.  It's pretty delicate.  If there are any tiny cracks fill them in with a bit of glue.


Ok , so now you are thinking..Um Ames now we have a TP heart, what do we "do" with it.  Here are my ideas. 
1. Make it into a magnet.  I buy the round, black magnets at Hobby Lobby that are 8 for $3.
2. Make it into an ornament. Before the heart completely dries poke a hole in the top.  When it's dry tie a ribbon through the hole and hang on the tree!

Happy Crafting!
Ames