CLICK HERE FOR FREE BLOGGER TEMPLATES, LINK BUTTONS AND MORE! »
Showing posts with label Tips. Show all posts

Friday, March 18, 2011

Everything in the mouth!

I know it's "normal" for kids to put things in their mouth.  They are exploring their world, blah blah blah. Most toddlers quirks I can handle, no problem.  Toys in the mouth...not so much. All I know is that when I see Finley (across the room) pick up a toy at playgroup and pop it in her mouth I want to gag.  It's not really a "germ thing" as much as I just think it's gross.  Of course I would have a kid that (no matter what I do) puts everything in her mouth.  This habit carries over into crafts but I refuse to let that keep me from doing crafts with my girl.  Here's what I do to keep Finley from eating her art projects.

  • For toddlers, high chair = eating.  If you put something on that tray, they don't care if it's a hamburger or a crayon, they are going to eat it. So, don't do crafts in the high chair.  Most of the Paint & Prozac crafts are "contained" in a box or in a bag.  Why? Because it can me created in the living room without ruining the carpet.  What if we are doing a project that isn't "contained"? I lay down a large blanket in the living room (just make sure your little one sits down and doesn't run off the blanket).  Cookie sheets are excellent to use as a table for painting or play dough on the blanket.  Plus it can just go in the dishwasher...bonus!
  • If you must do a project in the high chair (like finger painting) let your little one have their pacifier.  Usually I only allow binkies at bedtime or when I can't stand the screaming anymore or when Finley finds a long lost binky under the couch.  Sorry, tangent.  In theory I only allow binkies at bed time.  But if that beloved thing is in her mouth it's not coming out...not even to lick a paint brush. 
  • Plan crafts for just after a meal or snack.  We usually do crafts right after breakfast or morning snack.  If they are full, they seem to be less likely to put stuff in their mouths.
  • RELAX (don't you just love how I always throw that one in there?)!  Everything is non-toxic (right?) but it certainly doesn't taste good.  If your little one has a couple tastes of paint and it's awful they are probably going to stop.  If you react by jumping up and yelling it's probably going to encourage the behavior.  How fun is it to get mom all worked up?  Toddlers love to get a big reaction so don't give them one. Just calmly remove the art supply from their mouth and clean it up. 
So far I have showed you that babies are never too young for art, helped minimize the mess, and given tips to keep crafts out of little mouths.  What else keeps you from doing crafts with your kids???

Happy Crafting!
Ames

Tuesday, March 15, 2011

Who's afraid of the big bad mess? (edited)

Edited because I forgot some!

When I taught preschool (pre-Finley) I had 20 three year olds painting, gluing, and making creative messes 5 days a week.  Compared to that, one toddler painting is nothing to stress about.  I find that many parents shy away from doing crafts because of "the mess." Here are some of my thoughts on THE MESS!

  • Start with Mess-Free projects until you and your little one get comfortable with crafting. (see Ziploc painting, ice cube painting, marble art, coffee can painting)
  • Use a paint shirt.  I use old t-shirts. They work perfectly and they are free :)
  • Make sure you use WASHABLE paint/markers/glue.
  • Add a drop or two of dish soap to paint before finger painting. It makes it much easier to wash off.
  • Do messiest projects on bath days.  I am going to assume that you bathe your child on a regular basis.  So, if you are already planning on a bath, who cares if there's some paint, marker, or glue to wash off.
  • I am going to make another assumption. You mop your kitchen floor on a regular basis, right?  If you are planning to mop at nap time (that's when I mop) anyway, who cares it there's a little paint to mop up.  In fact, I find paint much easier to mop up than spaghetti sauce and with a toddler spaghetti sauce inevitably ends up on the floor regularly. For the record I very rarely have a big paint mess.
  • Do projects on a blanket. Rather than messing with high chairs I often just lay a blanket on the living room floor.  If it gets messy I either shake it outside (for food based projects) or throw it in the washer.  Much less labor intensive than sweeping or mopping. 
  • Keep cheap baby wipes handy for quick clean up of hands and tables. 
  • The most important tip: RELAX! Seriously, what's the worst thing that can happen?  In my opinion...this picture makes any little mess well worth the effort.

We do a craft every single day in our house and I almost never have a huge mess to clean up...I promise! You can do it!

Happy (mess-free)crafting!
Ames

Friday, March 11, 2011

Supplies...

Some people have asked what "basics" they should have on hand for crafts so I put together a list for ya.  Of course this is just my opinion :)

The Basics
  • Paint-Finger paint is best for toddlers because it's goopy (better texture for little ones) and it washes up easier.
  • Water Color Paint
  • Paint brushes (the bigger the better)
  • Paper-A pack of multiple colors of construction paper and a pack of card stock.
  • Washable Markers
  • Crayons
  • Glue (good ole Elmer's works best)

Useful Extras
  • Pom poms
  • Foam pieces (either shapes or sheets)
  • Bingo markers
  • Tissue paper
  • Marbles
  • Feathers

Handy Household Items
  • Cotton balls
  • Ziploc bags (buy them on clearance after a holiday and use a coupon)
  • Wax paper
  • Foil
  • Plastic wrap
  • Cookie sheet
  • Cookie cutters
  • Shoe box ( I keep one per child handy)
  • Cylinder of some sort (coffee can/formula can)
  • Ice cube tray
  • Food coloring
  • Shaving cream (the cheap stuff)
  • Sprinkles (I really don't like using glitter with little ones so they are a good substitute)
  • A large blanket
  • Old t-shirt (the best kind of paint shirt)
Things to buy cheap (aka clearance section of Hobby Lobby)
  • Unfinished wood items (frames, boxes, etc)
  • Clear Christmas bulbs
  • 3/4 inch magnets

I have found the best place to buy finger paint is a teacher store.  They sell the paint in pints for much cheaper.  Everything else I buy at Hobby Lobby or Michael's (watch for coupons).  Target sells a lot of the same things but they are way more expensive.  Make sure you browse the clearance section of craft stores for treasures!!!

I am sure I forgot some important things but it's a start.  Feel free to comment and add your must have art items!

Happy Crafting!
Ames
Thursday, March 10, 2011

Babies CAN do crafts!

I can't tell you how many times I have heard "my baby is too young to do crafts" since I started this blog.  Well I am here to tell you...you are WRONG (in the most polite way of course!).  If a baby can hold a small toy they can create art. I am so excited about this post because I love babies and I love crafts, combine the two and I am a happy camper.  I don't have a little baby anymore (she is 15 months) so I borrowed the adorable Miss. Sidney for a power art session. Sidney is just 3 months old. Normally I wouldn't do multiple projects in a row with a little one but I only had a couple hours so ya gotta do what ya gotta do.

The first rule of baby art (other than the obvious safety things) is that it's about the PROCESS not the PRODUCT.  You need to look at each art project as a creative sensory experience and the fact that you can hang adorable "proof" of this experience on the fridge is a bonus.  When planning baby art think about what babies like-noise, texture, color, and new things.  For the record Sidney never touched paint directly during today's projects but I have done straight up finger painting and toe painting with tiny ones many times.  (Note: Baby wipes make for quick and easy clean up.)

Here's what we did:

Project one- Add paper and paint to a ziploc baggie.  Let the baby look at it, touch it, crumple it.  Talk to the baby about how it feels (smooth, squishy, cold). Talk about the colors and what the paint looks like (red. blue, purple, shiny, thick).


Project 2: Add paper and colored ice cubes (water & food coloring) to a baggie. Encourage the baby to move the ice cubes around.  Talk about how the ice cubes feel (cold, hard, slippery) and how they look (colors, rectangle).  Explain what's happening to the ice cubes and why they are melting.  (Gotta start science young!)


Project 3: Place paper, paint, and marbles in a plastic container with a lid (I used a frosting container-confession: I don't always make my own frosting!). Instead of marbles try a ping pong ball, golf ball, pennies, grapes, etc,.  Talk to the baby about how the container feels (heavy, smooth, cold). As she moved is, what does it sound like?


Project 4: Lay paper on a cookie sheet (I used a disposable one only because I found it while packing and have no other use for it). Put some paint in the middle of the paper.  Cover with plastic wrap. I put Sidney on her Boppy and showed her the project.  She touched it.  Normally she hates tummy time but she did great!  Talk about the colors and the way the plastic wrap feels.  Also try different textures to cover up the paint such as wax paper, cellophane, or bubble wrap (bubbles up).

Notice that I put a blanket down in case there were any messes. (Of course I was the one that spilled paint on the blanket, not the baby.)

Normally I would take shoes and socks off for this part but Sidney was getting hungry so we improvised.

Here are some of Sidney's finished projects!


Remember: the shape of the paper and the color of the paint can be changed in any of these projects to suit any holiday or your personal taste.

Well there you have it folks, proof that babies can do art!  I hope you try some crafts with your tiny ones soon and send me some pictures!!!

Today is the last day to enter the amazon.com gift card giveaway!!!
Happy Crafting!
Ames

Monday, February 28, 2011

Piles & Piles of Art, OH MY


I am so excited that so many of you have started doing more crafts with your kids!  I love getting all the emails and comments about your projects.  Keep sending emails and pics. 

We are getting ready to move and I have realized I have hoarding tendancies. Before you start judging me and wondering if you recognize me from the A & E show it's not what you are thinking.  I'm not a hoarder in  the I have 45 expired yogurts in the fridge or bags of cat hair I can't part with kind of way.  I save things that have "sentimental value."  My college ID (do you think I can still get a student discount at the movies?), the last gift my mom gave me (a pair of socks still tied together with a blue ribbon), the boutineer my husband was wearing the night we fell in love (we were both standing up in a wedding)...and now that I have a kid it's piles and piles and piles of her artwork.  I just can't throw it away, so what the heck can I do with it?  Clearly, shoving all of them in her top dresser drawer won't work forever.

This is what I pulled out of the dresser drawer.


So here's what I'm doing!


Idea 1: Art Scrapbook

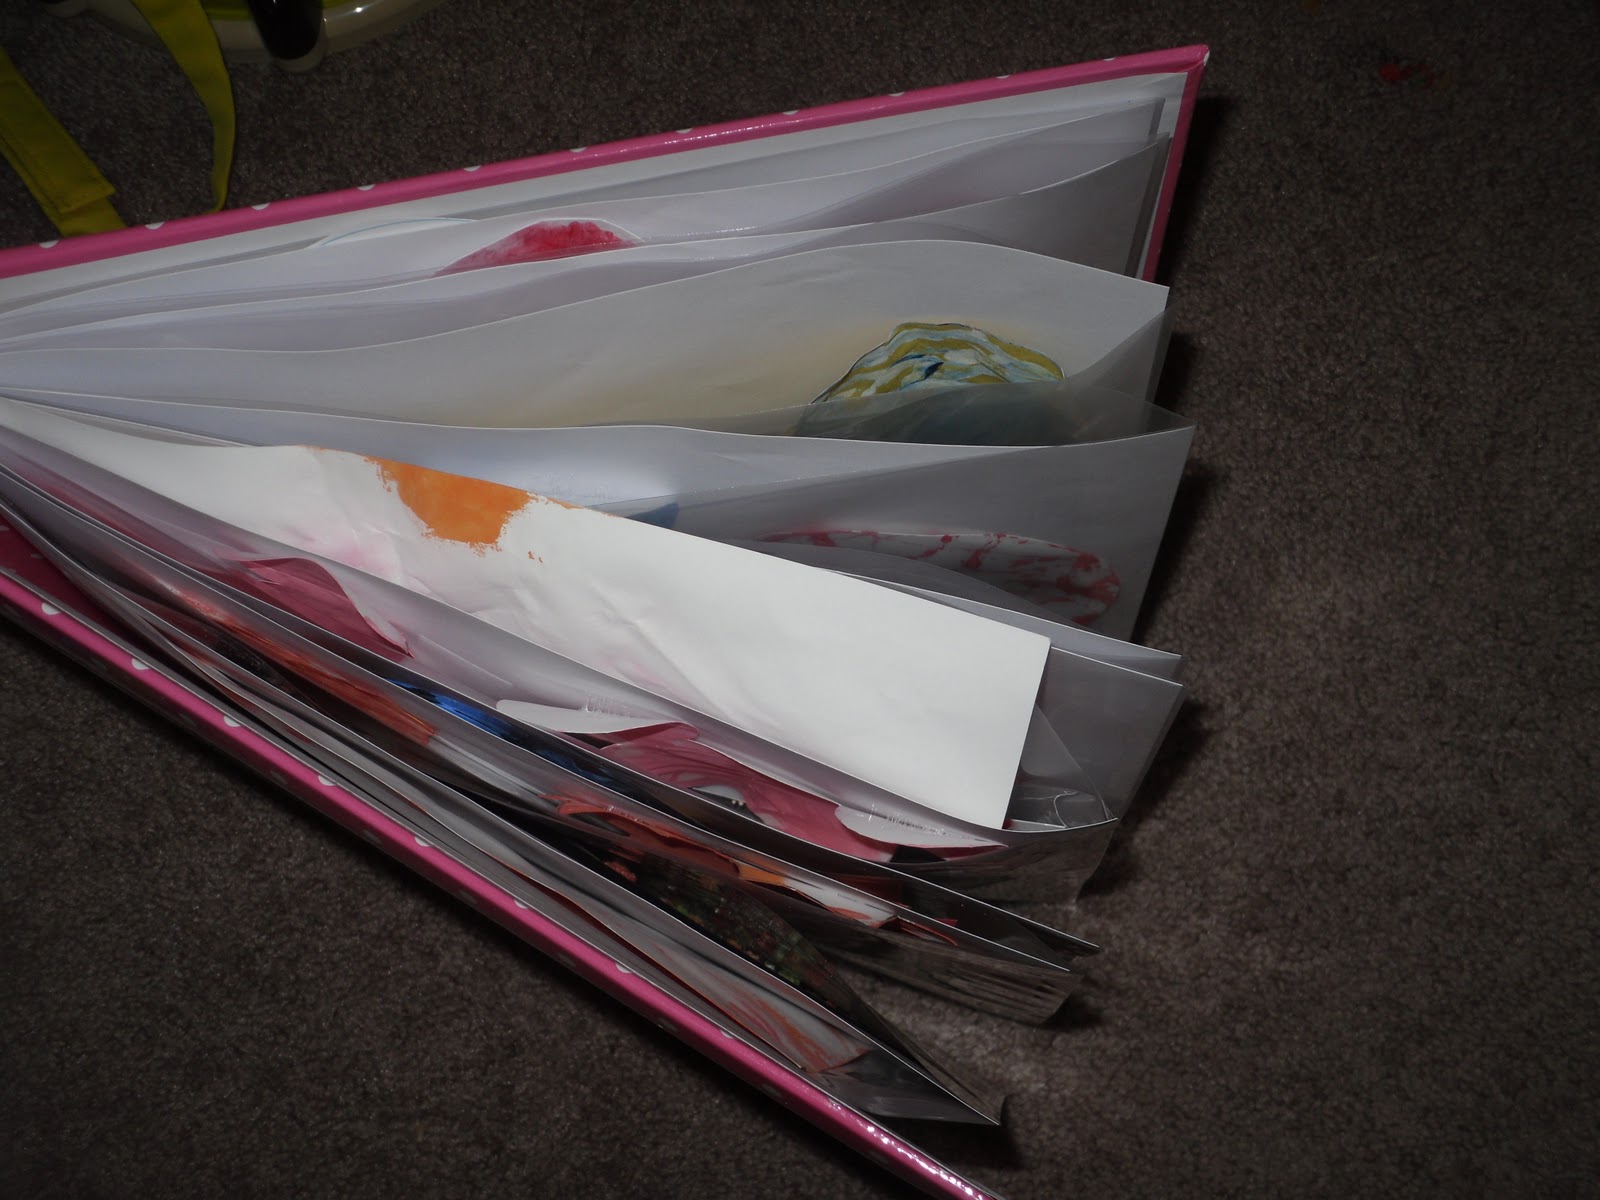
Why not make an art scrapbook?  I don't scrapbook (although I wish I did) so this is new for me.  I bought this scrapbook at Hobby Lobby for around $8.  It was 50% off and since I have never bought such a thing I have no idea if it was a "good deal" but I think it's super cute.  I am a sucker for anything with polkadots.


I am sure there is a super cute crafty way to arrange these but I just glued them to the pages.


Finished product!  Much neater!

Idea 2: Marble Magnets

I know you have seen these.  They sell them in cutesy stores, on Etsy, and at craft shows but they are SUPER easy to make.  I saw this idea on Not Martha (follow these directions they are really good). I first made these for a few friends as Valentine's Day this year using heart scrapbook paper.  Then I thought, why can't I use the kids' art instead of scrapbook paper? So, I tried it out and they turned out so cute.  These make great gifts for grandparent too! Who can't use more magnets? 

They don't photograph well...mostly because I suck at taking pictures


I bought this handy dandy  punch...made the process super quick and it was less than $5.


Idea 3: Use for scrap booking

Now, since I don't scrapbook I haven't tried it so it's technically just a theory.  But I am imagining using a painting or a colored piece of paper to cut out letters or mount pictures.  Saves $ and keeps memories...it's win-win.

Idea 4: Collage

Buy a collage frame.  Kohl's always has inexpensive collage frames on sale.  Trim pieces of art to fit in each section.  Then you are able to display 12 or so paintings neatly and in a small space. I plan to do this in the playroom in our new house.  And there's no law that says you can't encouage your kids to paint with colors that match your house!


Obviously Finley didn't paint those...it's just inspriation.

Happy Crafting (and organizing your crafts!),
Ames

*Just a note...the spell check would't work today so when you find typos...sorry.